
The Process Behind
- Jun 6, 2022
- 3 min read
Updated: Sep 26, 2022
In this post, I would like to share the process of creating a spread illustration, from start to finish. This image is part of a dummy book I created few weeks ago.
This method is based on Lorelay Bove's process, who is a designer at Disney's. I was lucky enough to attend a workshop of her in Sevilla in 2019 at La Galeria Roja.
I usually begin with a research phase, where I explore different characters, prompts and ideas. This stage is quite "blurry"in my head, but little by little, things become clear. It is usually fun and I tend to work in various places (not necessarily in my studio). But I will elaborate on this in a following post.
After the "exploration" stage", I start to do colour thumbnails. I use color pencils, regardless the technique I will use later. I find that this is way quicker than getting my watercoulours, brushes or collage papers.
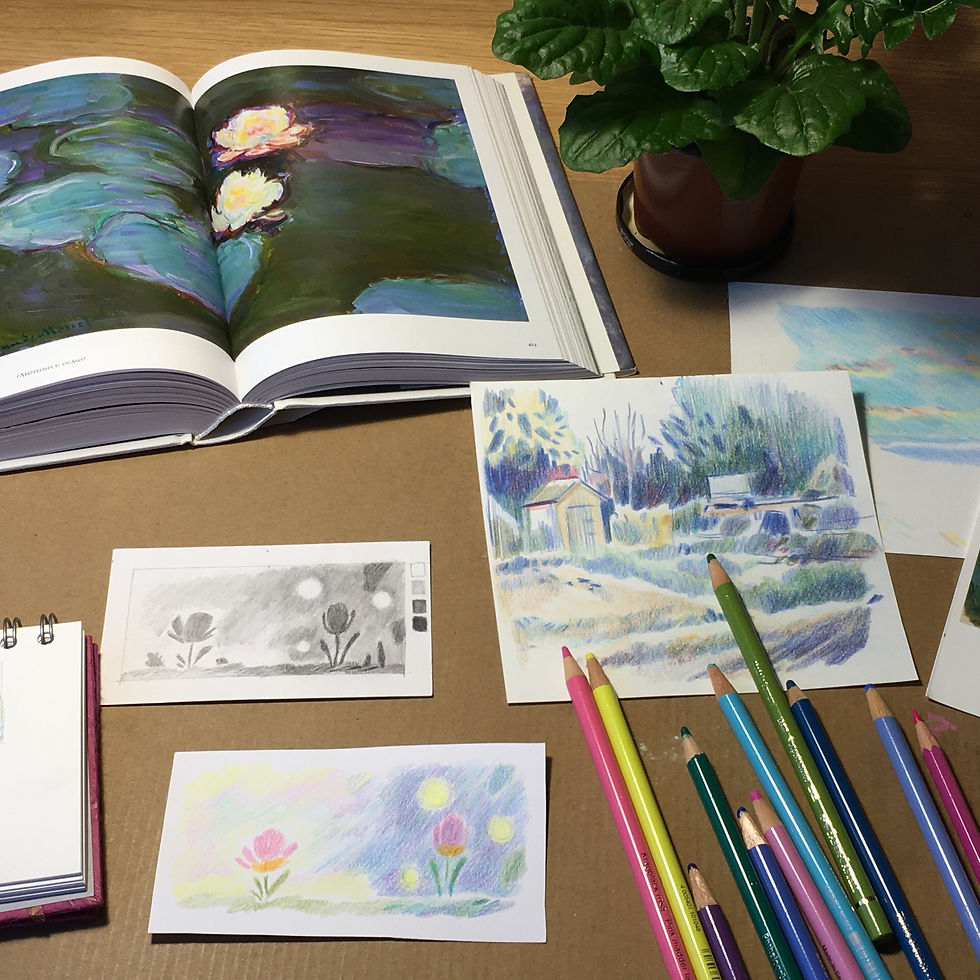
I used to do these thumbnails just using a pencil (or pen). Just with lines and values in black and white, following Lorelay's process. However, after some time, I realized this step didn't work for me at all. It took me a while to realize that colour is a very important element in my illustrations, and the sooner I started to work with them the better.
I was locked in a nice design, and then, I felt I did not have much energy to explore different moods using different colour palettes.
Now, this process is much simpler for me. Starting using colour pencils and big shapes, I can do these thumbnails quickly and explore the different compositions fast. Different colour combinations provide different emotions, and it is necessary to play with them to your advantage.
I really enjoy doing thumbnails, and this step can be quite long. It is good NOT to rush it and sit in the uncertainty of not getting things right from the start. This can be hard sometimes, but it gets better with time.
Having a good thumbnail is like having a great skeleton of our illustration. There is plenty of information about how to do them, and why, I leave you here a YouTube video of ArtProf where you can check more information.
After the colour thumbnails, I quickly explore the different values with a black and white thumbnail. This is a refinement stage, where I make sure that my characters or my focal point is in a location where the contrast is higher with the background. At this stage I refine the colour choices in my head, thinking about value and saturation, while doing a black and white small study.
Yay! We have tumbnails now and then I go into refining my design using a digital tablette, a quick colour study full size using colour pencils and then I go into final art using a light box. I got the light box recently, and it has become my best friend!
Therefore, for a while, I was stuck in a process that did not really work for me, but because I learnt it from someone reputable, and way more experienced than me, I trust it! Maybe for a bit too long. I felt stuck and without energy at the begining of each illustration and I did not even know why!
So, if you feel sometimes stuck with your illustration, I invite you to think: where do I get stuck? Could I change something in the ORDER or the WAY I do this illustration?
This really worked for me, and I hope you can find your way too if you havent find it yet. There is light at the end of the tunnel!


Comments